Tuesday, July 30, 2013

The Elusive Engine Zinc!

New pencil zinc on the left, and the (missing) zinc that was removed from our heat exchanger on the right.

When I recently wrote a post about engine maintenance, a reader stated that he noticed we didn't mention anything about our engine zinc.  Engine zinc?!  Ken and I have both flipped through our Universal 25 manual several times, and we've never seen anything about a zinc.  Did we miss something?

After looking into this on the web, I learned that we do indeed have an engine zinc, often called a pencil zinc.  It's located in the bottom of our heat exchanger, and for some reason was left out of the owner's manual.  Crap!  No wonder we never read anything about this zinc.

I've learned that inside the heat exchanger, hot coolant (50/50 mixture of anti-freeze and water) runs through small tubes that sit in cold seawater.  The seawater absorbs the heat, which is discharged into the exhaust system then out of the boat's transom.  With all that water, the zinc is necessary to protect the other metals from corrosion ... thus protecting the engine.

Ken found the location of the zinc pretty easily.  It's attached to the winterizing drain plug at the bottom of the heat exchanger.  For those not familiar with the looks of a heat exchanger, check out the picture below.  It's the long horizontal tube that lies across the back of the engine.  You can't see the zinc in the picture, but it's easy to find.  


When Ken removed the zinc, there was nothing left.  We've owned Nirvana for over three years so we weren't surprised.  The zinc should be checked every 3-4 months and replaced at least every year ... even if it looks fine.

There are different sizes of zincs, and the proper size for the engine is determined by the size wrench that fits the hex head of the drain plug.  A 7/16" wrench =  1/8" thread, a 9/16" = 1/4" thread, and 11/16" = 3/8" thread.  Ken was able to find the zinc we needed at West Marine for about $10 bucks ... or at least he thought he had.  However, when he tried to put the new zinc in the heat exchanger it wouldn't fit.  I had read that some folks find the zinc to be too long and cut it, but our zinc seemed to be too thick.  After grabbing a mirror to get a better look, we quickly realized the problem.  The hole was heavily corroded, thus making the new zinc too thick.

What to do now?  After more research, Ken has decided to remove the heat exchanger.  We're going to bring it to a local radiator shop and have them boil it.  Ken's then going to replace the gaskets along with the zinc then re-install the heat exchanger.  This is probably a good time to replace the hoses and clamps too.  Better now than later!

We're so grateful that one of our readers mentioned the zinc to us.  If he hadn't, we may have ended up having to buy a new heat exchanger ... or a new engine!

While this is yet another delay in sailing this Summer, we're glad to learn about all of this now.  The more we know about our boat before cruising, the better.  With the recent maintenance on our engine, our quadrant (radial wheel drive) and now this ... I'm feeling like I know so much more than I did two months ago.  I'm getting a broad sense of how an engine works.  I've never had a desire to learn how to work on my car, but our boat ... that's another story.

Hasta luego ... until then.  Mid-Life Cruising!

Friday, July 26, 2013

Everything Is Broken!

Ken ... this is what he looks like lately!  We've been trying to balance our landlubber life with our cruising future.

As I stepped into the shower the other day, I tensed up as I felt the cold water hit my back then jumped right outta that shower.  I hate cold showers, and I know I'm gonna have to deal with them when we're cruising.  But until then, I'm gonna enjoy my hot showers ... or am I?  I waited and waited for the water to heat up, and it never did.  When I mentioned this to Ken, he checked out our hot water heater.  This thing is probably over 25 years old and it was shot.  So, over $300 bucks (and Ken's labor) later ... I can take a hot shower again.

A couple of weeks earlier, Ken had to replace and paint some of the wood around our house that a squirrel or something ate two huge holes in.  This again meant Ken's labor and more money.  Our refrigerator, washer and dryer are at least 15 years old and they're not as efficient as they used to be.  We're hoping they have at least another 6 months left in them.  If not, we'll be using the laundromat.  We've been paying a guy to cut our grass since we don't wanna buy a lawnmower for just a few months ... that's now turned into two summers.

I swear I'm not exaggerating when I say that I've had four pairs of shoes break on me this summer!  They're all pretty old (and cheap) and I was hoping they'd last till I quit working ... no such luck.  I'm wearing out my work clothes for as long as I can, but they're also getting faded and showing their age.  

Ken's in the construction business, and he's been needing to replace a few of his tools for a while now.  He's finally had to break down and buy a couple within the past few months.  Tools breaking in the middle of a job that's an hour away from the nearest store isn't productive.  We feel like everything is broken!

Speaking of broken, there's Ken's wrist.  About two months ago, I wrote about his injury.  After one doctor visit with x-rays, we chose to go against the doctor's advice and not spend thousands of dollars on more x-rays, a body scan, a CAT scan.  Ken "became doctor", bought himself a brace and wore it most of the time while trying to run a construction business without making things worse ... not easy.  About a week ago he finally went to see an orthopedist so he could take another x-ray and make sure everything was healing okay.  Ken's wrist is still hurting, so we both thought this visit was needed.  The doctor said that his wrist had been fractured but the cast he would have ordered would be coming off right about now.  Luckily, Ken's wrist is healing properly, so the next step is to stop wearing the brace (so Ken won't lose his range of motion) and keep being careful for another month or two.  We can't ask for much better news than that I guess.  We're happy that Ken doesn't need surgery and everything healed properly.  We'll both be happier when he's totally healed without hurting it again!

All of this had us thinking how tough it is to be preparing for the lifestyle of cruising while waiting on a house to sell!  I've written a post about the emotional toll of reaching a goal, but there's also the financial toll.  We don't wanna buy anything that won't have its place on the boat, because that's ultimately a waste of money.  However, we need to keep our house in good condition for that future buyer.  We also need to continue to make an income while living on land, and keep our businesses running.  Then there's our sailboat, Nirvana ... she needs to be properly maintained.

Now this all wouldn't be that big of a deal if money were no object, but the sad truth is ... it is!  In fact, since we decided to sell our house, it's sale has become more of a necessity than a choice.  Yeah, we could keep it if we weren't gonna cruise, but we'd have no quality in our life .. just living paycheck to paycheck.  Don't know why so many folks are okay with that ... we hate it!  With the price of food, gasoline, hazard and flood insurance for our house, car insurance, health insurance, property taxes steadily rising ... we're doing our best to not incur any  new debt.  That would ultimately come right out of our house sale, which is our cruising kitty.

So, we juggle things and we contemplate every purchase that doesn't have a place on the boat.  Some things we just have to buy until we leave the dock.  I'm not gonna lie ... sometimes we feel exasperated and wonder if we're kidding ourselves in thinking we'll ever cruise!  We vent, we curse ... we take a deep breath and focus on positive thoughts.  Why am I telling you all of this?  As I've said before, this blog is about the whole cruising experience from the very beginning ... including the bad with the good.  At the end of the day, we know all of this will work out, and we stay happy.

The other day Kenny Wayne Shepherd's song, "Everything Is Broken" was playing in my head so I thought I'd share it here.  A little trivia ... Kenny Wayne Shepherd is NOT the singer ... he's the young blonde guitarist.  We realized this when we went to see him at the House of Blues a few years ago.  He's a great guitar player, he plays so effortlessly.  As he said that night ... he just can't sing!  He wanted to form a band and play his music, so he found a singer for his band.  Enjoy some good ole' Southern Blues ...


Hasta luego ... until then.  Mid-Life Cruising!

Tuesday, July 23, 2013

Corroded Radial Drive Wheel


When Ken and I were cleaning out the aft locker of our cockpit recently, we noticed that our drive wheel had a lot of surface corrosion ... ugh!  The drive wheel controls the boat's rudder through the steering wheel, so like everything on a boat ... it's important.  The aft locker shouldn't be getting wet, so we were surprised to find this.  After further inspection, we noticed that the drive wheel was wet at the center, where it meets the rudder post.   We then noticed that the aluminum emergency tiller head has little cracks around the perimeter ... maybe this is the source of the problem.   Some tape on it for a quick, temporary fix.

Emergency tiller head, with plenty of cracks for water to seep through ..

We had big plans of installing our lazy jacks and new sail pack this past weekend, but rain messed that all up.  However, Sunday afternoon was dry and overcast.  Ken decided to clean a couple of winches (see how here), since we have seven of them.  Hurricane Isaac made an unexpected visit after he cleaned one for the first time last year, interrupting his plans to clean the others.

Since it was a cloudy afternoon and actually pleasant outside, I figured I'd take advantage of the weather and clean our drive wheel while Ken was cleaning the winches.  I lightly sanded some of the corrosion off, but the area around the rudder post had a moist layer of crud on it.  I started getting this off with my fingernails, and then came up with the bright idea to use a little screwdriver ... I'm such a genius, right.  I was careful not to scratch the surface, and about 2 hours later I had removed just about all of the crud.  Removing the crud wasn't hard, but reaching it wasn't an easy task!  Getting to the drive wheel required bending over the aft locker with my butt in the air, burying  my head inside, working upside down, and reaching my hands into tiny little crevices.  I'd loosen the crud with the screwdriver, then use it and my fingers to remove it.  Two days later, my butt and legs are still sore!

My work area .. the aft locker and emergency tiller head (behind the wheel, back of cockpit).


When opening the aft locker, there's a removable piece of fiberglass which leads to the drive wheel.


  Using our camera to get in areas we can't, we're able to see the wheel a little better.  Pic below ... top of the wheel.  All the brown stuff in the middle is the crud that I removed.


Another view of the top ...


The wheel ... side view


The bottom of the wheel ... gonna need to clean this real soon from our quarter berth.


After removing all the crud, I wiped the wheel lightly with some paint thinner.  The "after" picture below looks a bit better ...


than the "before" picture.


Ken cleaned a couple of winches, then had dinner coming off the grill as I got out of the shower.  Perfect timing!

If you have any suggestions as to what we can do to prevent further corrosion, feel free to share!  Obviously, we've got to seal the emergency tiller head, but any suggestions regarding that or what we can spray on the wheel ... or anything would be welcomed.

Hasta luego ... until then.  Mid-Life Cruising! 

Friday, July 19, 2013

Getting Buff(ed)


I wish that I was talking about myself, but the only thing getting buff(ed) around here is Nirvana.  With her recent cleaning, we couldn't ignore it any longer ... the topsides were really chalky.  Chalky is a bad thing on a boat, meaning the gel coat is just about gone.  For those that don't know, gel coat is kinda like the sheetrock on the studs of a house.  It's sprayed over the fiberglass, providing protection from the elements.  When the gel coat loses its shine and becomes chalky, it becomes porous ... not a good thing!  So, a new paint job on Nirvana's topsides is gonna be required.  

Painting Nirvana's topsides isn't going to be an easy task.  We'll either have to remove everything from the deck, or we'll have to tape everything off to protect it.  Either way, it's gonna be a pain even before we break open the paint.  Then, pretty much everything above Nirvana's rub rail will have to be painted ... including the cockpit.

We're ready to wrap up our current projects on Nirvana and get some sailing in before summer is over.  So, Ken decided to buy some time and have the topsides treated with a product he's heard some good things about ... 3M Restorer & Wax.  This stuff is supposed to restore heavily oxidized (chalky) finishes and seal/protect it as well.  It's applied on the boat's surface and then rubbed in, without removing it.

After borrowing a buffer from a friend, Ken bought four 16 oz. bottles of the 3M Wax and a couple of 3M wool compounding pads.  I spent a least an hour removing tape adhesive from the areas surrounding our teak that was left behind from our recent teak project.  Why did I wait so long?!  Anyway, I got all of the adhesive off with some denatured alcohol then Ken gave the boat a quick washing so he could test a spot on the boat.  His wrist is still healing (and hurting), so if the spot came out okay he was going to have a friend wax the boat for a real fair price.  Holding a buffer for a few hours wouldn't be a good thing for Ken's wrist.

After a small section was complete on the bow ... the skies opened up.  When the rain finally stopped that evening, I took the picture below.  You can see where the 3M was applied ... on the left side of the picture above the cord.  See where the water is beaded up?  The right side of the picture is dry as a bone.  We were glad to see the difference, and know that the 3M was adding protection.  


The following day our friend finished the job while Ken and I went back to work.  We figured it was worth the money to have this done, since it took him about 5 hours.  For less than a $100 bucks we saved a day's work, and Ken's wrist.  In fact, later that day Ken went to the orthopedist to make sure he didn't make things worse by avoiding the doctors and hospitals (and their astronomical charges) a couple of months ago ... more on that later.

I would have shown you before and after pictures, but the pictures didn't pick up any noticeable difference.  The boat has a nice sheen that wasn't there before, but it's not shiny like we'd hoped.  However, our boat is really overdue for a paint job so shiny was probably a high expectation.  Our main concern was adding protection, so we're happy with the results.   At least we bought some time and can put this dreaded project off until next Spring.  In case you're wondering, three of the four bottles of the 3M were used ... on a 30 ft. boat.  And yes ... the 3M was applied to the non-skid areas as well.  I know there's some controversy about waxing the non-skid surfaces, but we felt that our boat needed it.  Afterwards ... the non-skid isn't slippery, it's still non-skid.

Hasta luego ... until then.  Mid-Life Cruising!

Tuesday, July 16, 2013

The Life of CLOD ...

Living in Louisiana, it's easy to find good (and cheap) seafood at any time.

Recently another future cruiser mentioned that we're both CLODs ... huh?  She said it stands for "Cruisers Living On Dirt"!  Yeah, I guess that's about right.  Every minute of every day Ken and I are thinking about cruising.  We don't buy anything if it's not for the boat, and we're anxious for the day that we finally sell our house.  Anxious ... that's an understatement!  We're about to pull our hair out with this anchor that is our house.  

Until our house sells, we've been distracting ourselves with necessary projects and maintenance on the boat and the daily routine of work.  We do live in a great neighborhood but ... we've "been there, done that" and are longing for a new chapter in our lives.  Until then, we try and make the best of our situation with evenings spent in our backyard ... music (on our new Flips), food on the grill, and wine ... lots of wine!  

Actually, not that much wine but it sounds more exciting doesn't it?  Ken doesn't drink wine, and I don't want the extra spending (or the calories) so I only drink wine about once or twice a week, and only a couple of glasses.  Did I mention I'm a real lightweight?  Less drinking is also a good habit for cruising.  Too much alcohol can destroy a budget ... fast!  I'm definitely no wine expert, but I found some great wine at Wal-Mart.  It comes in several varieties and it's called Oak Leaf.  I like the Pinot Grigio, and it's only $3 bucks a bottle!  I can imagine Nirvana stocked up with these bottles of wine when we leave.  What will Ken stash on Nirvana?  He likes beer, also the cheap kind ... Busch.  He's been drinking it for ... how many years?!  Let's just say since high school ... LOL!

We're looking forward to finishing up the latest work on Nirvana within the next week or two ... then sailing!  There's nothing more therapeutic than relaxing on the water.  

Hasta luego ... until then.  Mid-Life Cruising!

Friday, July 12, 2013

Nirvana's New Bimini

Our new bimini ... with zippers, loops and window.

When we decided it was time to replace our old and torn bimini, I started planning ... and stressing!  We were having our bimini sewn by a local seamstress and as usual, I was over thinking everything.  Biminis aren't cheap so I wanted to make sure we did it right.  There were many factors to consider when planning our bimini, which I wrote about here.  I hope our considerations will be helpful to others planning a bimini.

When Nirvana had her bimini fitting, there were a few adjustments that needed to be made.  The seamstress was quick to make the changes, and we're really happy with the results.  Our new bimini has the same marine vinyl strips sewn on top for extra protection that our old bimini had (ordered from Sailrite), as well as a few things that our old one didn't ... zippers to allow easy removal, a Strataglass window, and some fabric "loops" on the sides of the bimini and near the center of its ceiling.  What are the loops for?  Well, all sorts of things.  The loops on the sides of the bimini can be used to hang Christmas lights, a sun or privacy screen (with showers rings or paper clips), or anything else that we may wanna hang from our bimini.  The two loops on the bimini's ceiling can hang solar lights, or maybe even a little disco ball ... who knows?!  Thanks to a follower on our Facebook page, who gave us this idea.  BTW, we do plan on adding zippers on the sides, front and back of the bimini before we leave so we can add different types of panels for privacy, wind and bugs, but the loops will still be great for lights ... and maybe a little wind chime or something every now and then.

Loops sewn along the sides to hang things ... Christmas lights, privacy screens, etc.

Two things about our Strataglass window ...placement and where to buy the Strataglass.  Unfortunately, the window should have been placed further back in order to get a good view of the mast.  I shoulda listened to Ken!  Also, when I was searching online for a place to buy the Strataglass, most places only sold it in a large roll.  Since this stuff isn't cheap, that would have been quite expensive.  However, I did find a site called Sailmaker's Supply, which sells smaller pieces of Strataglass.  I was able to order a foot (54" wide) for $28.  When I received it there was almost two feet!  I guess this was because some of the Strataglass wasn't 54" wide.  I now have some extra left for a future project.  Turned out to be a great deal!

The marine vinyl strips and our Strataglass window ... we didn't have the bimini pulled tight, thus the wrinkle.

Unlike Isinglass, the makers of Strataglass stress that their cleaner must be used.  Now, chances are that's a bunch of crap but I didn't wanna test it.   So, I also bought some Strataglass Cleaner and some 303 Fabric Guard, which is for waterproofing the Sunbrella.  We've since decided that our Sunbrella bimini and sail pack don't need to be sprayed when new, so we now have some for later.

Other things I learned ... darker canvas, thread, and zippers last longer than the lighter colors.  I was glad to hear this since our Sunbrella is Forest Green and the thread and zippers are black.  Also, a good thread is crucial in keeping the life of the bimini ... Tenara thread seems to be the most recommended.

Purchasing a new bimini seemed more like a "need" than a "want" to us.  The sun is not only dangerous (skin cancer), but it's just brutally hot!  Since we'll be living on Nirvana, we think our bimini will make living aboard a lot more pleasant.  Not only will it provide great shade, but it will also make our cockpit cozier and more private when we add some fabric on the sides.  Hang a solar light, pour a glass of wine ... you get the picture.  Aaahhh, I can't wait for those experiences!  Actually, we already hang out in the cockpit with wine and music ... in our backyard.  It's not the islands, but it'll work for now.

Our sail cover really looks bad next to our new bimini ... a new sail pack on the way!

Hasta luego ... until then.  Mid-Life Cruising!

Tuesday, July 9, 2013

Engine Maintenance 101

Our Universal 25 diesel engine.  Although it's dirty, it's not that black around the edges ... something with the camera.  That pretty orange thing is the new FRAM oil filter.

Continuing with Nirvana's maintenance, Ken tackled the filters and fluids on Nirvana.  There was the oil (15W-40), oil filter (FRAM PH3593A), fuel filter (WIX 33390), water/fuel separator filter (Racor 2010TM-OR), transmission fluid (Type A), and impeller (Oberdorfer) ... enough to fill an afternoon.  

Impeller ... what's an impeller?!  Until recently, I'd never heard of such a thing.  I learned that the impeller is a part of the raw water pump that circulates water in order to cool the engine's internal cooling system.  You can see what it looks like in the pic above (that rubber piece in the middle that kinda looks like a star).  I also learned that this one little part is about $45 bucks!  Luckily, this impeller came with the boat.

  Nothing is easy on a boat right?!  When Ken changed the impeller, there was a little metal ring (snap clip) that needed to be removed and replaced (see the ring in top left corner of impeller package).  The ring came off easily, but putting the new one back on ... not so much.  Basically, Ken had to make his own little tool to get the thing on there by grinding down a pair of snap ring pliers.  About an hour later it was finally on.  There were two metal rings that came with the impeller (see pic).  Those are oil seats, which usually don't come with the impellers.  We didn't install those at this time since that's a whole other project.

Our impeller definitely needed changing, as you can see in the picture below.  The rubber was pretty beat up, and was starting to crack.  When I researched the maintenance schedule online, I found that it's recommended that an impeller should be replaced every 200 hours or every 2 years in clear water.  It should also be removed every winter to prevent the vanes from being bent all season.  If your engine over-heats for any reason, the impeller should be replaced.  Our engine over-heated shortly after owning Nirvana.  Perhaps that's why it needed changing, or maybe it's due to the fact that we've owned Nirvana for over 3 1/2 years and we're changing it for the very first time.

The old impeller, with the oil seats (seals) and an extra paper gasket.

Although Ken had changed the oil and oil filter before, he'd never changed the Racor fuel filter/water separator filter until now.  Needless to say, it was filthy and we plan on changing this annually.  Also, per Universal's recommendations, the oil & filter should be changed every 75 hours, the transmission oil (fluid) every 100 hours, and the fuel filter every 100 hours.  When changing the fuel filter, Ken also needed to bleed the air out of the diesel line in order to be able to re-fill the filter with fuel and restore pressure to the system.  He said it was easy ... just open the bleeder valve until you get fuel.   When removing the oil and transmission fluid, Ken used a hand pump.  When replacing the oil, Ken just used a funnel.  However, adding the transmission oil (fluid) was a little trickier.  The transmission is located at the back of the engine, underneath the heat exchange.  This makes it a PITA to get to the transmission, so Ken used a long spout to replace the transmission oil (fluid).

Cleaning out the hand pump and spout with Dawn soap and water ...

Our engine is located underneath the salon cushions, around the galley's counter.  If you're familiar with Catalina 30's, you'll notice that the port side settee has been raised (thus the wood strip at the top of the engine, under the cushions) by the previous owners.  We think they did this to allow more space for the Universal 25 engine, which about 3" higher than the standard engine.


It's always good to have spares nearby, so we plan on buying more filters, another impeller and a water pump soon to have as a backup.  If you have a Universal diesel engine, did you know that you can buy Kubota tractor parts much cheaper?  That's what we did when our engine over-heated and we needed a water pump.  We saved a lot of money!  The details and where we ordered the pump from are in our post here.

I'm starting to learn the basic concepts of the engine, and the next time Ken does all this work I plan on learning how to do it myself.  We never know what situations will arise when cruising, so the more I learn the better.

Hasta luego ... until then.  Mid-Life Cruising!

*UPDATE:  A reader commented that we didn't mention changing our zinc ... what zinc?!  Yep, we didn't know about that, but we do now.  Check out my post about the condition (and location) of our zinc here.

Friday, July 5, 2013

Independence Day

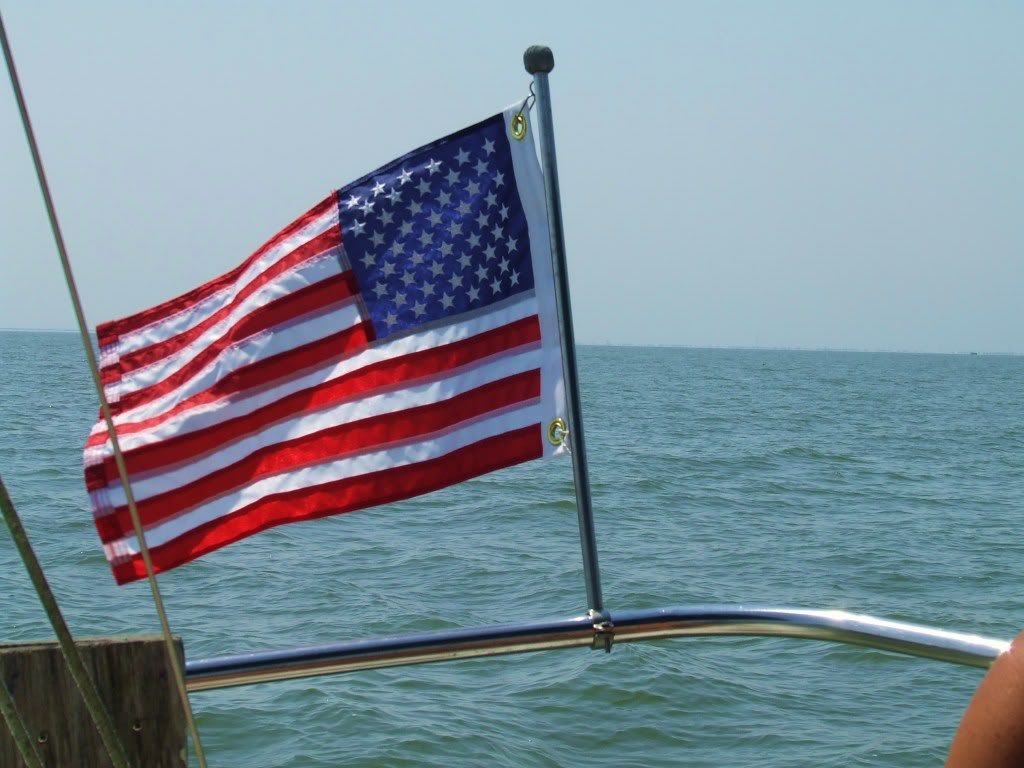
Nirvana's flag ... from a previous summer

Yesterday we hung out with our daughter and her fiancee at his parent's place nearby.  We don't get to see her as often as we'd like, so it was nice to spend time with family.   Barbecue, burgers n brew ... the American tradition on "Independence Day".  After eating way too much, we all piled in the truck to go check out a barn nearby that might be a good spot for our daughter's wedding next Spring.  My dad has a barn that he offered, but it's at least an hour away so we were hoping this local barn would be a good alternative.   As it turns out, the barn was perfect and the grounds were beautiful.  We've found a place for our daughter's dream barn wedding!  The best part, the owners are friends of the groom's family ... no charge.  

Like every 4th of July and New Year's Eve, we enjoyed an amazing fireworks display once we got back home.  Our neighborhood really gets into blowing things up, and they really put on a show ... from every direction.  Ken and I sat out back for about an hour, and the fireworks were still going strong when we went inside.  A great way to end the day!

On the eve of July 4th, we spent the evening in our backyard ... in Nirvana's cockpit.  The tunes, the breeze, the early-bird fireworks, and the scenery made us feel like we were on vacation.


Today brings rain for the next five days ... ugh!  Don't think we'll be getting much done on Nirvana this weekend.  As you may know from recent posts, we did order a few things for Nirvana and hope to have them on her soon.  The seamstress made the adjustments on our new bimini that were needed after our bimini fitting, and we think it's gonna work great.

Just as I stressed on planning our new bimini, Ken's been stressing on designing our lazy jack system for our new sail pack that we've had for almost a year now. Lazy jacks look simple, but there were several things to consider.  Ken made the final decision on the blocks and rings, and ordered them this past Monday.  (I'll write a post soon about what Ken considered when designing our system).  They should arrive about the same time as our new "teak alternative" handrails.  We also scooped up a boat hook at West Marine that was half-price for one day only.  We get excited about things for the boat, so it's been feeling like Christmas!  We also sold our old ports that we've been having since replacing them over a year ago.  The extra money came at the perfect time.

Hope all of you that celebrate "Independence Day" had a great one.  I can't help but think that this holiday will have a lot more meaning for us once we're cruising and are no longer tied down by our house and bills.  That's independence!

Hasta luego ... until then.  Mid-Life Cruising!

Tuesday, July 2, 2013

Cleaning n Protecting Lexan and Isinglass

Our retrofit ports ... looking great after 9 months with no attention

When Ken installed our retrofit windows on Nirvana and replaced the Lexan on our hatches, we stressed about how we were going to keep them looking great.  After all, Lexan can scratch so easily.  We wondered what product to use to keep our ports and hatches clean without scratching them.

I searched online and went to the local automotive store, only to find stuff to clean cloudy headlights.  That stuff may do the trick, but I wasn't ready to buy it until I searched a little longer.  Then, when Ken and I were at the local hardware store I found something that sounded like what I was looking for.  It didn't have a catchy name, and the can was pretty dull but I liked what it said.   It's called 210 Plastic Cleaner & Polish.  You just spray it on and wipe off in a circular motion with a soft cloth.  The Lexan will be clean, with a protective coating left behind.

We bought a can of the 210, but it took me about a week to get the nerve to try it.  What if I scratched our brand new ports?!  I grabbed a new micro-fiber cloth and went for it.  I held my breath while I sprayed the port, knowing that Ken was also nervous about this product I decided to buy.  After rubbing the cleaner/polish off the port, I was relieved to see that this stuff seemed to actually work!  I cleaned all the ports and hatches, then went inside the boat and cleaned the other sides.  That's when I knew I made the right choice.  The ports and hatches looked great from both sides, and I could feel the protective coating being left behind.  The exterior of the ports and hatches were clean and shiny.

After all this stress about keeping our ports and hatches clean, I didn't touch them again for about 9 months.   When Ken and I finally got around to cleaning our "dirty ass" boat a couple of weeks ago, I again cleaned the ports and hatches with the 210 Plastic Cleaner/Polish.  After all that time sitting in the sun with bird droppings, rain, leaves, etc. they still look great.  I really think the protective coating helped all that time.

I still have over half a can left, but I figured I'd see if West Marine carries this stuff.  I couldn't find it on their web site, but I did find it on Amazon's site here.  When looking for the 210 online, I noticed that it also removes marks from crayons and magic markers, paint over-spray, and residue from adhesive backings and masking tape.  It also states that it seals the plastic's pores, and the protective coating has UV inhibitors.  I came across a lot of great reviews on this stuff from other boaters as well.  

If you have Lexan that needs cleaning, I highly recommend this cleaner!  It's also supposed to be great for Isinglass and other types of plastic as well (not sure about Strataglass since they claim you must use their cleaner).  I no longer hold my breath when cleaning our ports and hatches.  Let me know if you try it and what you think.

Hasta luego ... until then.  Mid-Life Cruising!
Related Posts Plugin for WordPress, Blogger...